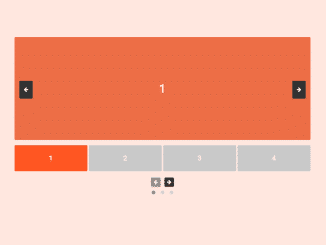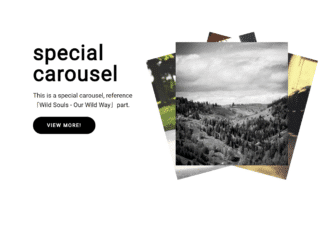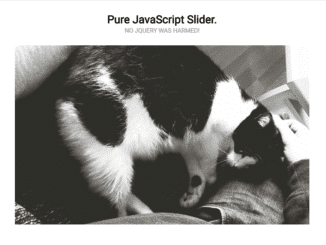
This code snippet helps you to create a synced Owl Carousel with thumbnails. It comes with two carousels. The main one displays large images. The thumbnail carousel shows smaller versions. It helps in smoothly navigating through images by clicking or using arrows.
You can use this code for image galleries on websites. It helps showcase products or portfolios with synchronized main images and thumbnails. One benefit is a seamless user experience for browsing multiple images.
How to Create Synced Owl Carousel With Thumbnails
1. First of all, load the Owl Carousel CSS and Font Awesome CSS (for icons) by adding the following CDN links into the head tag of your HTML document.
<link rel='stylesheet' href='https://cdnjs.cloudflare.com/ajax/libs/OwlCarousel2/2.0.0-beta.3/assets/owl.carousel.min.css'>
<link rel='stylesheet' href='https://cdnjs.cloudflare.com/ajax/libs/OwlCarousel2/2.0.0-beta.3/assets/owl.theme.default.min.css'>
<link rel='stylesheet' href='https://cdnjs.cloudflare.com/ajax/libs/font-awesome/4.7.0/css/font-awesome.min.css'>
2. After that, create the HTML structure for the carousel. Include two div containers, one for the main carousel and another for the thumbnail carousel.
<div class="outer">
<div id="big" class="owl-carousel owl-theme">
  <div class="item">
    <h1>1</h1>
  </div>
  <div class="item">
    <h1>2</h1>
  </div>
  <div class="item">
    <h1>3</h1>
  </div>
  <div class="item">
    <h1>4</h1>
  </div>
  <div class="item">
    <h1>5</h1>
  </div>
  <div class="item">
    <h1>6</h1>
  </div>
  <div class="item">
    <h1>7</h1>
  </div>
  <div class="item">
    <h1>8</h1>
  </div>
      <div class="item">
    <h1>9</h1>
  </div>
    <div class="item">
    <h1>10</h1>
  </div>
</div>
<div id="thumbs" class="owl-carousel owl-theme">
  <div class="item">
    <h1>1</h1>
  </div>
  <div class="item">
    <h1>2</h1>
  </div>
  <div class="item">
    <h1>3</h1>
  </div>
  <div class="item">
    <h1>4</h1>
  </div>
  <div class="item">
    <h1>5</h1>
  </div>
  <div class="item">
    <h1>6</h1>
  </div>
  <div class="item">
    <h1>7</h1>
  </div>
  <div class="item">
    <h1>8</h1>
  </div>
    <div class="item">
    <h1>9</h1>
  </div>
    <div class="item">
    <h1>10</h1>
  </div>
</div>
</div>
3. Add the necessary CSS styles to customize the carousel appearance. You can modify colors, sizes, and layouts as desired.
.outer { margin:0 auto; max-width:800px;}
#big .item { background: #ec6e46; padding: 120px 0px; margin:2px; color: #FFF; border-radius: 3px; text-align: center; }
#thumbs .item { background: #C9C9C9; height:70px; line-height:70px; padding: 0px; margin:2px; color: #FFF; border-radius: 3px; text-align: center; cursor: pointer; }
#thumbs .item h1 { font-size: 18px; }
#thumbs .current .item { background:#FF5722; }
.owl-theme .owl-nav [class*='owl-'] { transition: all .3s ease; }
.owl-theme .owl-nav [class*='owl-'].disabled:hover { background-color: #D6D6D6; }
#big.owl-theme { position: relative; }
#big.owl-theme .owl-next, #big.owl-theme .owl-prev { background:#333; width: 22px; line-height:40px; height: 40px; margin-top: -20px; position: absolute; text-align:center; top: 50%; }
#big.owl-theme .owl-prev { left: 10px; }
#big.owl-theme .owl-next { right: 10px; }
#thumbs.owl-theme .owl-next, #thumbs.owl-theme .owl-prev { background:#333; }
4. Now, include jQuery and the Owl Carousel library in your HTML file by adding the following CDN links just before closing the <body> element.
<script src='//cdnjs.cloudflare.com/ajax/libs/jquery/2.1.3/jquery.min.js'></script>
<script src='https://cdnjs.cloudflare.com/ajax/libs/OwlCarousel2/2.0.0-beta.3/owl.carousel.min.js'></script>
5. Finally, add the following JavaScript code within a <script> tag or link an external JavaScript file to initialize the OWL carousel.
$(document).ready(function() {
  var bigimage = $("#big");
  var thumbs = $("#thumbs");
  //var totalslides = 10;
  var syncedSecondary = true;

  bigimage
    .owlCarousel({
    items: 1,
    slideSpeed: 2000,
    nav: true,
    // autoplay: true,
    dots: false,
    loop: true,
    responsiveRefreshRate: 200,
    navText: [
      '<i class="fa fa-arrow-left" aria-hidden="true"></i>',
      '<i class="fa fa-arrow-right" aria-hidden="true"></i>'
    ]
  })
    .on("changed.owl.carousel", syncPosition);

  thumbs
    .on("initialized.owl.carousel", function() {
    thumbs
      .find(".owl-item")
      .eq(0)
      .addClass("current");
  })
    .owlCarousel({
    items: 4,
    dots: true,
    nav: true,
    navText: [
      '<i class="fa fa-arrow-left" aria-hidden="true"></i>',
      '<i class="fa fa-arrow-right" aria-hidden="true"></i>'
    ],
    smartSpeed: 200,
    slideSpeed: 500,
    slideBy: 4,
    responsiveRefreshRate: 100
  })
    .on("changed.owl.carousel", syncPosition2);

  function syncPosition(el) {
    //if loop is set to false, then you have to uncomment the next line
    //var current = el.item.index;

    //to disable loop, comment this block
    console.log(el);
    var count = el.item.count - 1;
    var current = Math.round(el.item.index - el.item.count / 2 - 0.5);

    if (current < 0) {
      current = count;
    }
    if (current > count) {
      current = 0;
    }
    //to this
    thumbs
      .find(".owl-item")
      .removeClass("current")
      .eq(current)
      .addClass("current");
    var onscreen = thumbs.find(".owl-item.active").length - 1;
    console.log(onscreen)
    var start = thumbs
    .find(".owl-item.active")
    .first()
    .index();
    var end = thumbs
    .find(".owl-item.active")
    .last()
    .index();
    console.log(end);
    if (current > end) {
      thumbs.data("owl.carousel").to(current, 100, true);
    }
    if (current < start) {
      thumbs.data("owl.carousel").to(current - onscreen, 100, true);
    }
  }

  function syncPosition2(el) {
    if (syncedSecondary) {
      var number = el.item.index;
      bigimage.data("owl.carousel").to(number, 100, true);
    }
  }

  thumbs.on("click", ".owl-item", function(e) {
    e.preventDefault();
    var number = $(this).index();
    bigimage.data("owl.carousel").to(number, 300, true);
  });
});
Adjust the carousel settings based on your requirements. Update parameters like the number of items to display, navigation options, autoplay, etc., within the JavaScript code provided.
That’s all! hopefully, you have successfully created a Synced Owl Carousel with Thumbnails. If you have any questions or suggestions, feel free to comment below.
Similar Code Snippets:

I code and create web elements for amazing people around the world. I like work with new people. New people new Experiences.
I truly enjoy what I’m doing, which makes me more passionate about web development and coding. I am always ready to do challenging tasks whether it is about creating a custom CMS from scratch or customizing an existing system.

