
This code creates a crossfading image slideshow using Pure CSS. It displays multiple images smoothly, transitioning between them. Helpful for showcasing content without needing JavaScript.
Use this code to add an attractive image slideshow to your website’s homepage or product pages. Enhances visual appeal and engagement.
How to Create a Crossfading Image Slideshow
1. First of all, load the Prefixfree JS by adding the following CDN link into the head tag of your HTML document.
<script src="https://cdnjs.cloudflare.com/ajax/libs/prefixfree/1.0.7/prefixfree.min.js"></script>
2. Create the HTML structure. Use <div> tags for the slideshow container and <figure> tags for each image and its caption. Replace the placeholder image sources and captions with your desired images and corresponding descriptions.
<div class="css-slideshow"> <figure> <img src="http://themarklee.com/wp-content/uploads/2013/10/class-header-css3.jpg" alt="class-header-css3" width="495" height="370" class="alignnone size-full wp-image-172" /><figcaption><strong>CSS3:</strong> CSS3 delivers a wide range of stylization and effects, enhancing the web app without sacrificing your semantic structure or performance. Additionally Web Open Font Format (WOFF) provides typographic flexibility and control far beyond anything the web has offered before.</figcaption> </figure> <figure> <img src="http://themarklee.com/wp-content/uploads/2013/10/class-header-semantics.jpg" alt="class-header-semantics" width="495" height="370" class="alignnone size-full wp-image-179" /><figcaption><strong>Semantics:</strong> Giving meaning to structure, semantics are front and center with HTML5. A richer set of tags, along with RDFa, microdata, and microformats, are enabling a more useful, data driven web for both programs and your users.</figcaption> </figure> <figure> <img src="http://themarklee.com/wp-content/uploads/2013/10/class-header-offline.jpg" alt="class-header-offline" width="495" height="370" class="alignnone size-large wp-image-178" /><figcaption><strong>Offline & Storage:</strong> Web Apps can start faster and work even if there is no internet connection, thanks to the HTML5 App Cache, as well as the Local Storage, Indexed DB, and the File API specifications.</figcaption> </figure> <figure> <img src="http://themarklee.com/wp-content/uploads/2013/10/class-header-device.jpg" alt="class-header-device" width="495" height="370" class="alignnone size-full wp-image-177" /><figcaption><strong>Device Access:</strong> Beginning with the Geolocation API, Web Applications can present rich, device-aware features and experiences. Incredible device access innovations are being developed and implemented, from audio/video input access to microphones and cameras, to local data such as contacts & events, and even tilt orientation.</figcaption> </figure> <figure> <img src="http://themarklee.com/wp-content/uploads/2013/10/class-header-connectivity.jpg" alt="class-header-connectivity" width="495" height="370" class="alignnone size-large wp-image-176" /><figcaption><strong>Connectivity:</strong> More efficient connectivity means more real-time chats, faster games, and better communication. Web Sockets and Server-Sent Events are pushing (pun intended) data between client and server more efficiently than ever before.</figcaption> </figure> <figure> <img src="http://themarklee.com/wp-content/uploads/2013/10/class-header-multimedia.jpg" alt="class-header-multimedia" width="495" height="370" class="alignnone size-large wp-image-175" /><figcaption><strong>Multimedia:</strong> Audio and video are first class citizens in the HTML5 web, living in harmony with your apps and sites. Lights, camera, action!</figcaption> </figure> <figure> <img src="http://themarklee.com/wp-content/uploads/2013/10/class-header-3d.jpg" alt="class-header-3d" width="495" height="370" class="alignnone size-large wp-image-174" /><figcaption><strong>3D, Graphics & Effects:</strong> Between SVG, Canvas, WebGL, and CSS3 3D features, you're sure to amaze your users with stunning visuals natively rendered in the browser.</figcaption> </figure> <figure> <img src="http://themarklee.com/wp-content/uploads/2013/10/class-header-performance.jpg" alt="class-header-performance" width="495" height="370" class="alignnone size-large wp-image-173" /><figcaption><strong>Performance & Integration:</strong> Make your Web Apps and dynamic web content faster with a variety of techniques and technologies such as Web Workers and XMLHttpRequest 2. No user should ever wait on your watch.</figcaption> </figure> </div> <p class="css-slideshow-attr"><a href="http://www.w3.org/html/logo/" target="_top">Images and captions are from the W3C</a></p>
3. Style the slideshow and its elements using CSS. Define the dimensions, transitions, and animations for the slideshow. Link the CSS file containing your styles to your HTML document using <link> tags. Ensure the HTML structure and CSS styles are properly connected.
body{
font-family: "HelveticaNeue-Light", "Helvetica Neue Light", "Helvetica Neue", Helvetica, Arial, "Lucida Grande", sans-serif;
  font-weight: 300;
}
.css-slideshow{
  position: relative;
  max-width: 495px;
  height: 370px;
  margin: 5em auto .5em auto;
}
.css-slideshow figure{
  margin: 0;
  max-width: 495px;
  height: 370px;
  background: #000;
  position: absolute;
}
.css-slideshow img{
  box-shadow: 0 0 2px #666;
}
.css-slideshow figcaption{
  position: absolute;
  top: 0;
  color: #fff;
  background: rgba(0,0,0, .3);
  font-size: .8em;
  padding: 8px 12px;
  opacity: 0;
  transition: opacity .5s;
}
.css-slideshow:hover figure figcaption{
  transition: opacity .5s;
  opacity: 1;
}
.css-slideshow-attr{
  max-width: 495px;
  text-align: right;
  font-size: .7em;
  font-style: italic;
  margin:0 auto;
}
.css-slideshow-attr a{
  color: #666;
}
.css-slideshow figure{
  opacity:0;
}
figure:nth-child(1) {
  animation: xfade 48s 42s infinite;
}
figure:nth-child(2) {
  animation: xfade 48s 36s infinite;
}
figure:nth-child(3) {
  animation: xfade 48s 30s infinite;
}
figure:nth-child(4) {
  animation: xfade 48s 24s infinite;
}
figure:nth-child(5) {
  animation: xfade 48s 18s infinite;
}
figure:nth-child(6) {
  animation: xfade 48s 12s infinite;
}
figure:nth-child(7) {
  animation: xfade 48s 6s infinite;
}
figure:nth-child(8) {
  animation: xfade 48s 0s infinite;
}

@keyframes xfade{
  0%{
    opacity: 1;
  }
  10.5% {
    opacity: 1;
  }
  12.5%{
    opacity: 0;
  }
  98% {
    opacity: 0;
  }
  100% {
    opacity: 1;
  }
}
Adjust the slideshow dimensions and styling to fit your website’s design. Experiment with different animations or timings within the keyframes for varied effects. Ensure your images are optimized for web viewing to improve load times.
That’s all! hopefully, you have successfully created a Crossfading Image Slideshow using Pure CSS. If you have any questions or suggestions, feel free to comment below.
Similar Code Snippets:
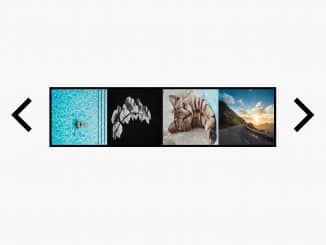
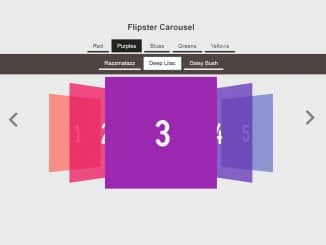
 JavaScript Autoplay Carousel with Play Pause Controls
- Lightweight Image Slider in Vanilla JS
- Slideshow HTML Code For Website


I code and create web elements for amazing people around the world. I like work with new people. New people new Experiences.
I truly enjoy what I’m doing, which makes me more passionate about web development and coding. I am always ready to do challenging tasks whether it is about creating a custom CMS from scratch or customizing an existing system.