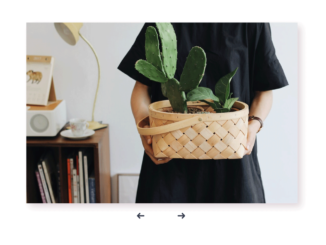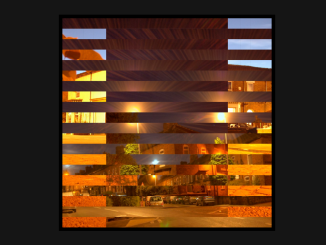
This code creates a lightweight image slider using Vanilla JS. It enables easy image navigation. The method manipulates image positions for a slideshow effect. It’s helpful for displaying multiple images in a compact slider format.
You can use this code on any website for a simple image slider. It’s easy to implement without external libraries, keeping your site lightweight. It offers a clean way to showcase multiple images with smooth navigation.
How to Create a Lightweight Image Slider in Vanilla JS
1. First of all, load the Font Awesome CSS (for arrow icons) by adding the following CDN link to the head tag of your webpage.
<link rel="stylesheet" href="https://cdnjs.cloudflare.com/ajax/libs/font-awesome/5.15.4/css/all.min.css" integrity="sha512-1ycn6IcaQQ40/MKBW2W4Rhis/DbILU74C1vSrLJxCq57o941Ym01SwNsOMqvEBFlcgUa6xLiPY/NS5R+E6ztJQ==" crossorigin="anonymous" referrerpolicy="no-referrer" />
2. Now, add the necessary HTML elements to your webpage. Include a container to hold the images and navigation buttons.
<div class="slider-container">
  <div class="image-container">
    <img src="https://picsum.photos/id/237/500/300" alt="image">
    <img src="https://picsum.photos/id/1/500/300" alt="image">
    <img src="https://picsum.photos/id/10/500/300" alt="image">
    <img src="https://picsum.photos/id/20/500/300" alt="image">
    <img src="https://picsum.photos/id/200/500/300" alt="image">
  </div>
  <i class="fas fa-angle-double-left btn prev"></i>
  <i class="fas fa-angle-double-right btn next"></i>
</div>
3. Apply the following CSS styles to create the slider layout, adjust sizes, and handle transitions.
body {
    margin: 0;
    display: flex;
    justify-content: center;
    height: 100vh;
    align-items: center;
    background-color: wheat;
}

.slider-container {
    position: relative;
    width: 500px;
    height: 300px;
    overflow: hidden;
    border-radius: 10px;
    box-shadow: 0 4px 8px rgba(0, 0, 0, 0.3);
}

.image-container {
    display: flex;
    transition: transform 0.4s ease-in-out;
}

.btn {
    position: absolute;
    top: 50%;
    transform: translateY(-50%);
    color: white;
    font-size: 20px;
    opacity: 0.5;
    cursor: pointer;
}

.btn.prev {
    left: 10px;
}

.btn.next {
    right: 10px;
}

.btn:hover {
    opacity: 1;
}
4. Finally, add the JavaScript code to enable image navigation and slideshow functionality.
const prevEl = document.querySelector(".prev");
const nextEl = document.querySelector(".next");
const imgEls = document.querySelectorAll("img");
const imageContainerEl = document.querySelector(".image-container");
let currentImg = 1;
let timeout;

prevEl.addEventListener("click", () => {
    clearTimeout(timeout);
    currentImg--;
    updateImg();
});

nextEl.addEventListener("click", () => {
    clearTimeout(timeout);
    currentImg++;
    updateImg();
});

updateImg();

function updateImg() {
    if (currentImg > imgEls.length) {
        currentImg = 1;
    } else if (currentImg < 1) {
        currentImg = imgEls.length;
    }
    imageContainerEl.style.transform = `translateX(-${(currentImg - 1) * 500}px)`;
    timeout = setTimeout(() => {
        currentImg++;
        updateImg();
    }, 3000);
}
Feel free to customize the slider further by adjusting sizes, styles, and interval timings to suit your website’s design.
That’s all! hopefully, you have successfully created a lightweight image slider in Vanilla JavaScript. If you have any questions or suggestions, feel free to comment below.
Similar Code Snippets:

I code and create web elements for amazing people around the world. I like work with new people. New people new Experiences.
I truly enjoy what I’m doing, which makes me more passionate about web development and coding. I am always ready to do challenging tasks whether it is about creating a custom CMS from scratch or customizing an existing system.

