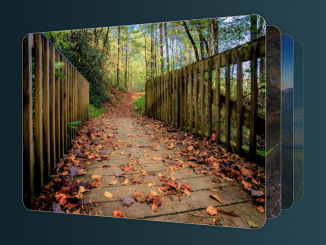
This HTML code snippet helps you to create an image slideshow on your website. It uses CSS and JavaScript to create a slideshow that automatically advances every 5 seconds. The user can also manually advance the slideshow using the arrow buttons. The slideshow is responsive, so it will look good on all devices.
This code can be used to create a simple slideshow for your website. You can customize the code to meet your specific needs, such as changing the design or adding new features.
How to Create Slideshow in HTML For Your Website
1. First of all, load the Font Awesome CSS by adding the following CDN link to the head tag of your website.
<link href="https://use.fontawesome.com/releases/v5.0.8/css/all.css" rel="stylesheet">
2. Copy the following container div structure HTML code. This will be the container for your slideshow, complete with left and right arrow buttons and dot indicators. Replace the image URLs with your desired image URLs. Ensure that each image has the same structure to maintain consistency.
 <div class="container">
      <div class="arrow arrow-left"><i class="fas fa-chevron-circle-left"></i></div>
      <img src="https://images.unsplash.com/photo-1518640027989-a30d5d7e498e?ixlib=rb-0.3.5&q=85&fm=jpg&crop=entropy&cs=srgb&ixid=eyJhcHBfaWQiOjE0NTg5fQ&s=f9575732a498c98486879d7000ab1d47" alt="">
      <img src="https://images.unsplash.com/photo-1505843378597-b96befae716e?ixlib=rb-0.3.5&q=85&fm=jpg&crop=entropy&cs=srgb&ixid=eyJhcHBfaWQiOjE0NTg5fQ&s=9e69634f39ec7c08514fef902cfc85ac" alt="">
      <img src="https://images.unsplash.com/photo-1471138406156-7a89e687a062?ixlib=rb-0.3.5&q=85&fm=jpg&crop=entropy&cs=srgb&ixid=eyJhcHBfaWQiOjE0NTg5fQ&s=7820fc816715b37942a793360b785c60" alt="">
      <div class="arrow arrow-right"><i class="fas fa-chevron-circle-right"></i>
      </div>
      <div class="dots">
        <div class="dot">
          <i class="far fa-dot-circle"></i>
        </div>
        <div class="dot">
          <i class="far fa-circle"></i>
        </div>
        <div class="dot">
          <i class="far fa-circle"></i>
        </div>
      </div>
    </div>
3. Style the slideshow using the following CSS code. You can modify the CSS rules in order to customize the slideshow according to your needs.
* {
  margin: 0;
  padding: 0;
  box-sizing: border-box;
}

body, html {
  width: 100%;
  height: 100%;
}

.container {
  width: 100%;
  height: 100%;
  position: relative;
  background: #355C7D;
  /* fallback for old browsers */
  background: -webkit-linear-gradient(to right, #C06C84, #6C5B7B, #355C7D);
  /* Chrome 10-25, Safari 5.1-6 */
  background: linear-gradient(to right, #C06C84, #6C5B7B, #355C7D);
  /* W3C, IE 10+/ Edge, Firefox 16+, Chrome 26+, Opera 12+, Safari 7+ */
  overflow: hidden;
}
.container img {
  width: 100%;
  height: 100%;
  object-fit: cover;
  position: absolute;
  margin: auto;
  top: 0;
  bottom: 0;
  left: 0;
  right: 0;
  animation: fade 1s;
}
.container .arrow {
  z-index: 10;
  position: absolute;
  margin: auto;
  top: 0;
  bottom: 0;
  left: auto;
  right: auto;
  width: 1.5rem;
  height: 1.5rem;
  font-size: 1.5rem;
  color: cornsilk;
  opacity: 0.5;
  transition: opacity 1s;
}
.container .arrow:hover {
  cursor: pointer;
  opacity: 1;
}
.container .arrow-left {
  left: 2%;
}
.container .arrow-right {
  right: 2%;
}
.container .dots {
  position: absolute;
  margin: auto;
  top: auto;
  bottom: 2%;
  left: 0;
  right: 0;
  width: 7rem;
  height: auto;
  z-index: 5;
}
.container .dots .dot {
  width: 2rem;
  height: 2rem;
  display: inline-flex;
  align-content: center;
  justify-content: center;
  color: cornsilk;
}

@keyframes fade {
  from {
    opacity: 0.1;
  }
  to {
    opacity: 1;
  }
}
4. Finally, add the JavaScript code to enable slideshow navigation. This includes handling left and right arrow clicks, updating the displayed image, and implementing an automatic slideshow.
const imgs = document.querySelectorAll(".container img");
const dots = document.querySelectorAll(".dot i");
const leftArrow = document.querySelector(".arrow-left");
const rightArrow = document.querySelector(".arrow-right");

let currentIndex = 0;
let time = 5000; // default time for auto slideshow

const defClass = (startPos, index) => {
  for (let i = startPos; i < imgs.length; i++) {
    imgs[i].style.display = "none";
    dots[i].classList.remove("fa-dot-circle");
    dots[i].classList.add("fa-circle");
  }
  imgs[index].style.display = "block";
  dots[index].classList.add("fa-dot-circle");
};

defClass(1, 0);

leftArrow.addEventListener("click", function(){
  currentIndex <= 0 ? currentIndex = imgs.length-1 : currentIndex--;
  defClass(0, currentIndex);
});

rightArrow.addEventListener("click", function(){
  currentIndex >= imgs.length-1 ? currentIndex = 0 : currentIndex++;
  defClass(0, currentIndex);
});

const startAutoSlide = () => {
  setInterval(() => {
    currentIndex >= imgs.length-1 ? currentIndex = 0 : currentIndex++;
    defClass(0, currentIndex);
  }, time);
};

startAutoSlide(); // Start the slideshow
That’s all! hopefully, you have successfully integrated this Slideshow HTML code on your website. If you have any questions or suggestions, feel free to comment below.
Similar Code Snippets:

I code and create web elements for amazing people around the world. I like work with new people. New people new Experiences.
I truly enjoy what I’m doing, which makes me more passionate about web development and coding. I am always ready to do challenging tasks whether it is about creating a custom CMS from scratch or customizing an existing system.


