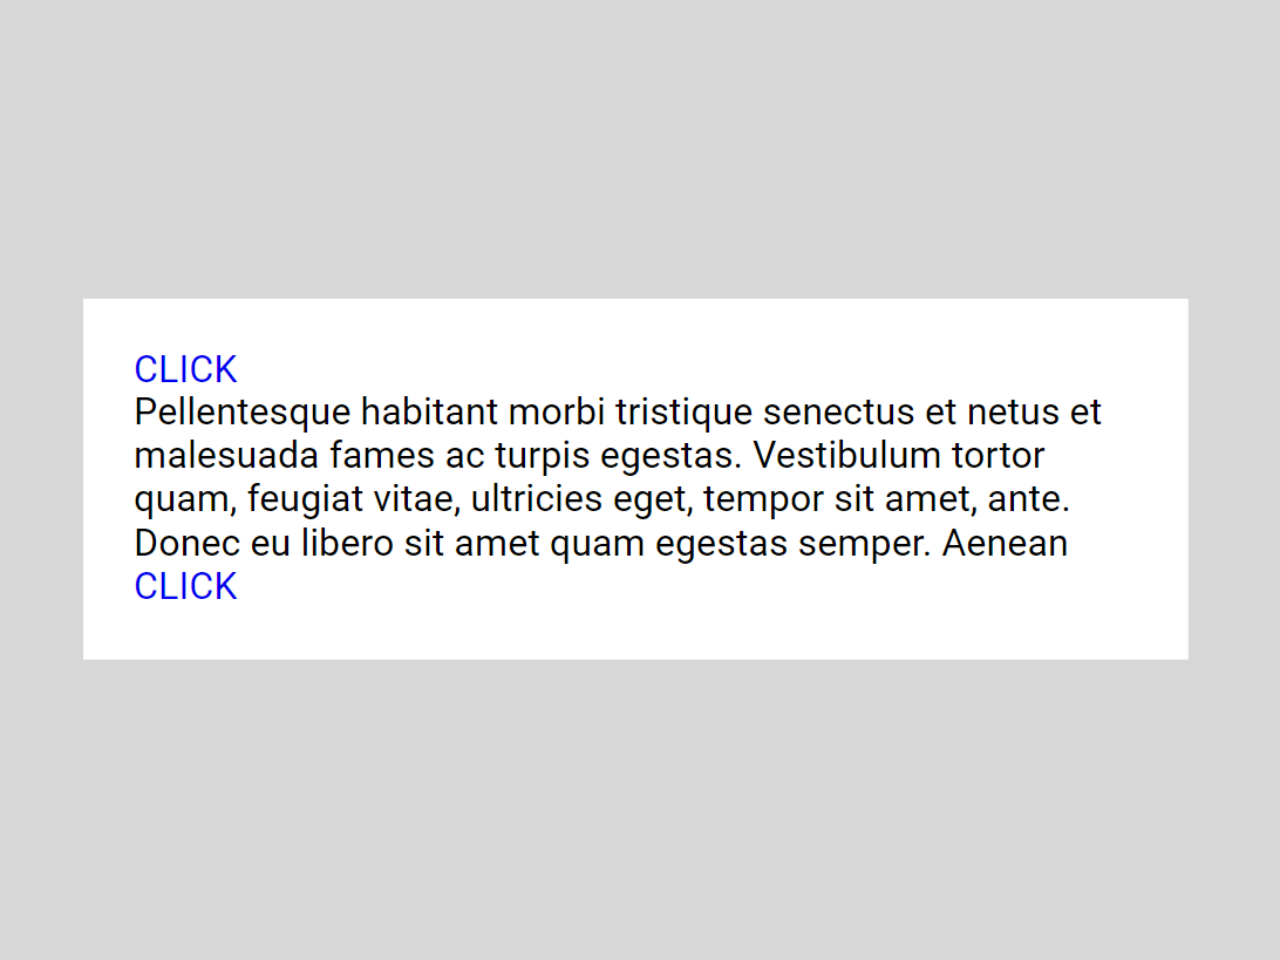
This simple JavaScript snippet helps you to expand and collapse div element on a webpage. It calculates and animates the height of the content div, providing a smooth visual transition.
Whether you are working on the accordion project or want to create multiple expandable/collapsible sections, this code quite fits your needs. With the help of this script, you can create interactive and space-efficient content displays on your website.
How to Expand and Collapse Div Using JavaScript
1. First of all, load the Normalize CSS and prefixfree JS by adding the following CDN links into the head tag of your HTML document. (Optional)
<link rel="stylesheet" href="https://cdnjs.cloudflare.com/ajax/libs/normalize/5.0.0/normalize.min.css">
<script src="https://cdnjs.cloudflare.com/ajax/libs/prefixfree/1.0.7/prefixfree.min.js"></script>
2. Create the HTML structure for expandable div elements as follows:
<ul>
  <li>
    <a href="#" class="expand">click</a>
    <div class="content">
<p>Pellentesque habitant morbi tristique senectus et netus et malesuada fames ac turpis egestas. Vestibulum tortor quam, feugiat vitae, ultricies eget, tempor sit amet, ante. Donec eu libero sit amet quam egestas semper. Aenean ultricies mi vitae est. Mauris placerat eleifend leo. Lorem ipsum dolor sit amet, consectetur adipisicing elit. Placeat accusamus sequi eum commodi sint consequatur magni magnam non culpa laborum aperiam voluptatem velit dolore cupiditate tempore. Quibusdam unde voluptas eveniet. Lorem ipsum dolor sit amet, consectetur adipisicing elit. Exercitationem laudantium laboriosam distinctio numquam corrupti eius eum inventore voluptas. Saepe temporibus nemo nobis deserunt ipsa id at mollitia magnam iusto eos?</p>
    </div>
  </li>

    <li>
    <a href="#" class="expand">click</a>
    <div class="content">
<p>Pellentesque habitant morbi tristique senectus et netus et malesuada fames ac turpis egestas. Vestibulum tortor quam, feugiat vitae, ultricies eget, tempor sit amet, ante. Donec eu libero sit amet quam egestas semper. Aenean ultricies mi vitae est. Mauris placerat eleifend leo. Lorem ipsum dolor sit amet, consectetur adipisicing elit. Placeat accu</p>
    </div>
  </li>
</ul>
3. Now, include the necessary CSS to style your expandable sections. The following code includes basic styling for the main container, content div, and the link. Customize the div element according to your needs.
.content {
  width: 0;
  height: 0;
  overflow: hidden;
  transition: height ease 0.5s;
}

.is-visible + .content {
  width: auto;
}

ul {
  list-style: none;
}
ul a {
  text-transform: uppercase;
  text-decoration: none;
}
4. The JavaScript code handles the expansion and collapse functionality. Copy the following code and include it in your HTML file, preferably at the end of the <body> tag.
var expand = document.querySelectorAll( '.expand' ),
    expandCount = expand.length,
    content = null,
    parent = null,
    parentWidth = 0;

for (var i = 0; i < expandCount; i++) {
  expand[i].onclick = function(e) {
    e.preventDefault();

    parent = this.parentNode;
    parentWidth = parent.offsetWidth;

    content = parent.querySelectorAll( '.content' )[0];

    // Calculate width of element to animate height
    var newHeight = getHeight( content, parent );

    content.style.height = newHeight + "px";

    if( !hasClass(this, 'is-visible') ) {
      addClass( this, 'is-visible' );
    } else {
      removeClass( this, 'is-visible' );
      content.style.height = "0px";
    }
  };
}

function removeClass(elem, className) {
    var newClass = ' ' + elem.className.replace( /[\t\r\n]/g, ' ') + ' ';
    if (hasClass(elem, className)) {
        while (newClass.indexOf(' ' + className + ' ') >= 0 ) {
            newClass = newClass.replace(' ' + className + ' ', ' ');
        }
        elem.className = newClass.replace(/^\s+|\s+$/g, '');
    }
}

function addClass(elem, className) {
    if (!hasClass(elem, className)) {
        elem.className += ' ' + className;
    }
}

function hasClass(elem, className) {
    return new RegExp(' ' + className + ' ').test(' ' + elem.className + ' ');
}

function getHeight( el, parent ) {
  var newEl = document.createElement('p'),
      height = 0;
  newEl.innerHTML = el.innerHTML;
  newEl.setAttribute('id', 'test-height');

  parent.appendChild( newEl );

  height = document.getElementById( 'test-height' ).offsetHeight;

  parent.removeChild( document.getElementById('test-height') );
  return height;
}
That’s all! hopefully, you have successfully created an expandable div element on your website. If you have any questions or suggestions, feel free to comment below.
Similar Code Snippets:

I code and create web elements for amazing people around the world. I like work with new people. New people new Experiences.
I truly enjoy what I’m doing, which makes me more passionate about web development and coding. I am always ready to do challenging tasks whether it is about creating a custom CMS from scratch or customizing an existing system.

