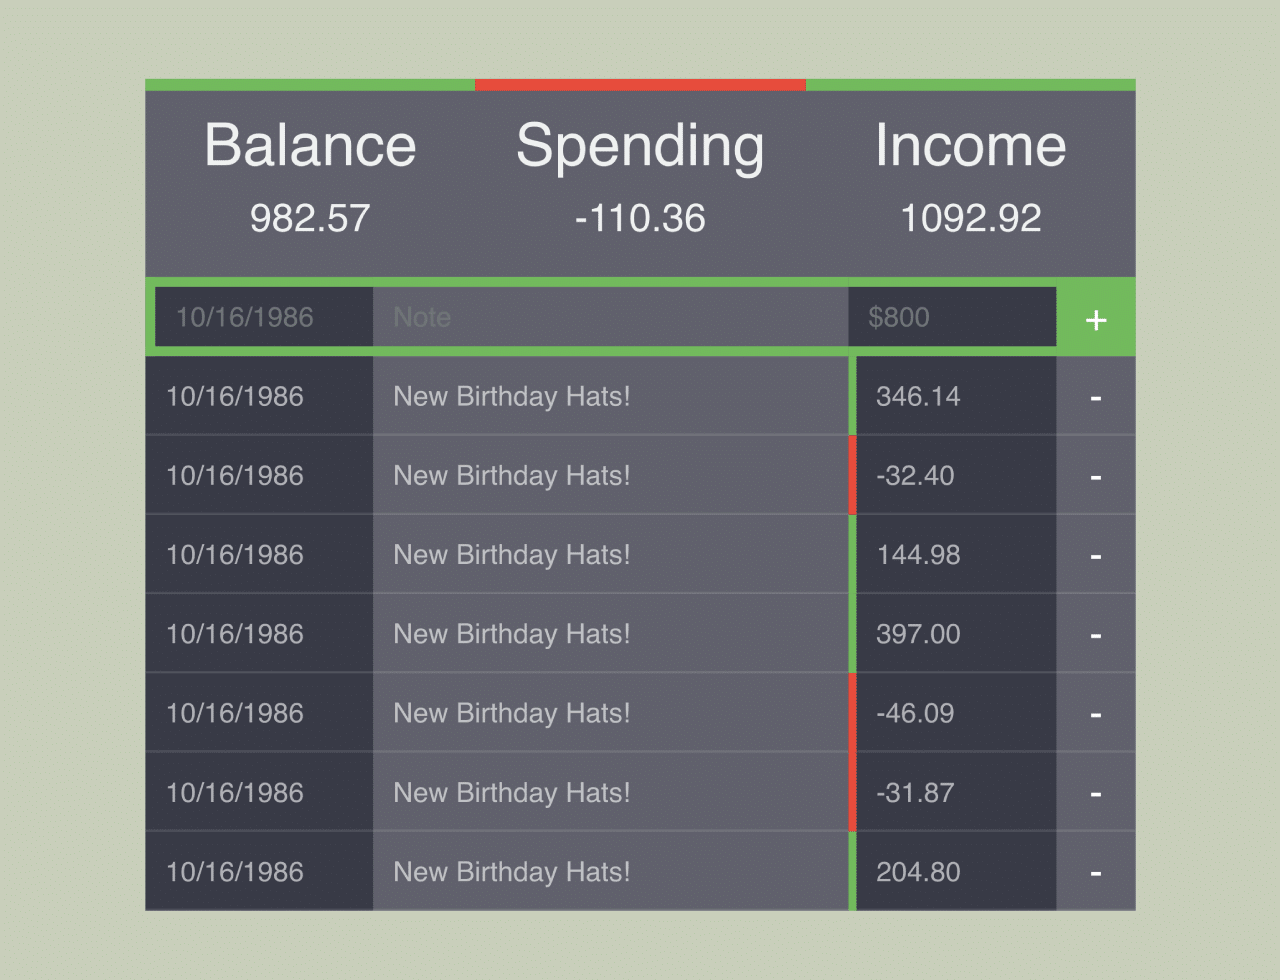

This jQuery code snippet helps you to create a simple financial ledger interface. It displays balances, spending, and income. The code allows you to add and remove transactions easily. It calculates and updates sums automatically. The interface organizes transactions neatly for easy viewing and management.
Use this code to build a user-friendly financial ledger interface for personal or small business use. The major benefit is easy transaction tracking and management.
How to Create a Simple Financial Ledger in jQuery
1. First of all, make sure to include the jQuery library by adding the following CDN link to the head of your HTML document:
<script src='//cdnjs.cloudflare.com/ajax/libs/jquery/2.1.3/jquery.min.js'></script>
2. Create the necessary HTML structure for your ledger. Copy the following HTML code, which includes div containers for balance, spending, income, and an entry form.
<div id="container">
  <div id="overview">
    <div class="balance">
      <h2> Balance </h2>
      <p>$300</p>
    </div>

    <div class="spending">
      <h2> Spending </h2>
      <p>$-300</p>
    </div>

    <div class="income">
      <h2> Income </h2>
      <p>$300</p>
    </div>

  </div>

  <div class="entry new">
    <input class="date" placeholder="10/16/1986" />
    <input class="note" placeholder="Note"/>
    <input class="amount" placeholder="$800"/>
    <div id="add-transaction" class="add-button">+</div>
  </div>

  <div id="sheet">

  </div>
</div>
3. Now, style the ledger using the following CSS styles. You can customize the CSS code to match your preferred styling. Adjust colors, fonts, or layout as needed to fit your website’s theme.
body {
  margin: 0;
  padding: 0;
}

div {
  box-sizing: border-box !important;
  -webkit-box-sizing: border-box;
  -o-box-sizing: border-box;
  -moz-box-sizing: border-box;
}

input {
  background-color: #383a47;
  border: none;
  box-sizing: border-box;
  -webkit-box-sizing: border-box;
  -o-box-sizing: border-box;
  -moz-box-sizing: border-box;
  height: 40px;
}

#container {
  margin: 0 auto;
  width: 500px;
}

#overview {
  background-color: #383a47;
  height: 100px;
  width: 100%;
}

#overview div {
  background-color: rgba( 255, 255, 255, 0.2);
  float: left;
  height: 100px;
  padding: 15px 0 0 0 ;
  width: 33.33%;
}

#overview p {
  color: rgba( 255, 255, 255, 0.9 );
  font: 20px/10px sans-serif;
  text-align: center;
}

#overview .balance {
  border-top: 6px solid #73BA5D;
}

#overview .spending {
  border-top: 6px solid #E74C3C;
}

#overview .income {
  border-top: 6px solid #73BA5D;
}

.entry {
  background-color: #383a47;
  border-bottom: 1px solid rgba( 255, 255, 255, 0.1);
  height: 40px;
  padding: 0 0 0 0;
  width: 500px;
}

.entry.new{
  background-color: #383a47;
  border-bottom: 1px solid rgba( 255, 255, 255, 0.1);
  height: 40px;
  padding: 0 0 0 0;
  width: 500px;
}

.entry div {
  color: rgba( 255, 255, 255, 0.6 );
  font: 14px/40px sans-serif;
  float: left;
  padding: 0 10px 0 10px;
}

.entry input {
  border-bottom: 5px solid #73BA5D;
  border-top: 5px solid #73BA5D;
  color: rgba( 255, 255, 255, 0.6 );
  font: 14px/40px sans-serif;
  float: left;
  margin: 0 0 0 0;
  padding: 0 10px 0 10px;
}

input.date {
  border-left: 5px solid #73BA5D;
}

input.amount{
  border-left: none;
}

.date {
  width: 115px;
}

.note {
  background-color: rgba( 255, 255, 255, 0.2);
  width: 240px;
}

.income .amount {
  border-left: 4px solid #73BA5D;
}

.spending .amount {
  border-left: 4px solid #E74C3C;
}

.amount {
  border-left: 4px solid #73BA5D;
  width: 105px;
}

.remove-button,
.add-button {
  background-color: rgba( 255, 255, 255, 0.2);
  color: #fff !important;
  font: 20px/40px sans-serif !important;
  height: 40px;
  text-align: center;
  width: 40px;
  webkit-touch-callout: none;
  -webkit-user-select: none;
  -khtml-user-select: none;
  -moz-user-select: none;
  -ms-user-select: none;
  user-select: none;
}

.remove-button:hover{
  background-color: rgba( 255, 255, 255, 0.3);
}

.add-button {
  background-color: #73BA5D;
}

.add-button:hover {
  background-color: #99BA5D;
}


h1 {
  color: rgba(0, 0, 0, .4);
  font: 40px/25px sans-serif;
  margin: 0;
  padding:0;
}

h2 {
  color: rgba( 255, 255, 255, 0.9 );
  font: 30px/25px sans-serif;
  margin: 0;
  padding:0;
  text-align: center;
}
4. Finally, add the following JavaScript code to functionalize the ledger. The Init() function sets up the initial state of the ledger. It generates sample data, updates sums, renders the table and handles the addition of new transactions.
"use strict";

var $balance = $('#overview .balance p'),
    $spending = $('#overview .spending p'),
    $income = $('#overview .income p'),
    $sheet = $('#sheet'),
    sheet = [],
    transaction = {
      date: '',
      description: '',
      amount: 0
    },
    transactionHTML = '<div id=" {id} " class="entry {class} "><div class="date"> {date} </div><div class="note"> {description} </div><div class="amount"> {amount} </div><div class="remove-button">-</div></div>',
    spendingClass = 'spending',
    incomeClass = 'income';

// Sum
//This would ordinarily be provided by ajax so that the whole ledger is accounted for rather than just the current page.
function UpdateSums () {
  var spending = 0,
      income = 0;

  for(var i =0; i < sheet.length; i += 1){
    if(sheet[i].amount >= 0) {
      income += sheet[i].amount;
    } else {
      spending += sheet[i].amount;
    }
  }

  $balance.text((income + spending).toFixed(2));
  $income.text(income.toFixed(2));
  $spending.text(spending.toFixed(2));
}

//RenderTable
function RenderTable() {
  ClearRenderSpace();

  for(var i = (sheet.length - 1); i >= 0; i -= 1) {
    var thisTrans = transactionHTML;

    if(sheet[i].amount >= 0) {
      thisTrans = thisTrans.replace('{class}', incomeClass);
    } else {
      thisTrans = thisTrans.replace('{class}', spendingClass);
    }

    thisTrans = thisTrans.replace('{id}', i.toString())
    .replace('{date}', sheet[i].date)
    .replace('{description}', sheet[i].description)
    .replace('{amount}', sheet[i].amount.toFixed(2));

    $sheet.append(thisTrans);
  }

  $('.remove-button').on('click', function () {
    console.log(this);
    RemoveTransaction($(this).parent().attr('id'));
  });
}

// Just like AJAX, except not.
function FakeData() {
  for(var i = 0; i < 25; i += 1) {
    var trans = Object.create(Object.getPrototypeOf(transaction));
    trans.id = i;
    trans.date = '10/16/1986';
    trans.description = 'New Birthday Hats!';
    trans.amount = (Math.random() * 500) - 100;

    sheet.push(trans);
  }
}

function ClearRenderSpace() {
  $('.remove-button').unbind('on', RemoveTransaction);
  $sheet.html('');
}

function Add(date, description, amount){
  if(date && description && amount){
    var trans = Object.create(Object.getPrototypeOf(transaction));
    trans.date = date;
    trans.description = description;
    trans.amount = parseFloat(amount);
    trans.id = sheet.length;

    sheet.push(trans);
    console.log(trans);
    UpdateSums();
    RenderTable();
  } else {
    alert('You fill all fields to add to the ledger');
  }
}

function RemoveTransaction(id) {
  sheet.splice(parseInt(id), 1);
  UpdateSums();
  RenderTable();
}

function Init(){
  FakeData();
  UpdateSums();
  RenderTable();
  $('#add-transaction').on('click', function () {
    Add(
      $('.new .date').val(),
      $('.new .note').val(),
      $('.new .amount').val()
    );
  });
}

Init();
That’s all! hopefully, you have successfully created a Simple Financial Ledger using jQuery. If you have any questions or suggestions, feel free to comment below.
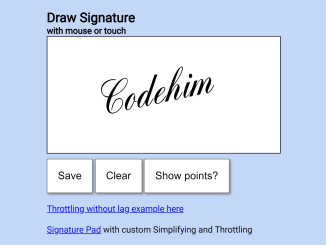
Similar Code Snippets:

- JavaScript Signature Pad Code with Example


I code and create web elements for amazing people around the world. I like work with new people. New people new Experiences.
I truly enjoy what I’m doing, which makes me more passionate about web development and coding. I am always ready to do challenging tasks whether it is about creating a custom CMS from scratch or customizing an existing system.