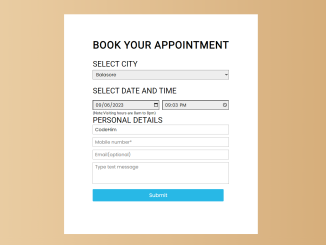
This HTML & CSS code snippet helps you to create an appointment booking form. It comes with a user-friendly interface to select a city, date, and time, input personal details, and submit an appointment request.
This code is helpful for creating an appointment booking system on a website, making it convenient for users to schedule appointments online. You just need to add an action attribute for this form and you’re ready to submit appointment details to the server.
How to Create an Appointment Booking Form in HTML & CSS
1. First of all, load the Google Fonts CSS by adding the following CDN link into the head tag of your HTML document.
<link href="https://fonts.googleapis.com/css2?family=Poppins&display=swap" rel="stylesheet">
2. Inside the <body> tag of your HTML file, create the form structure. You can copy and paste the following HTML code:
<main id="wrapper">
  <div class="container">
    <form action="#" id="appoint-form" method="POST">
      <h1 id="form-head">Book Your Appointment</h1>
      <label for="select city" id="city" class="format">SELECT CITY </label>
      <select id="dropdown">
        <option value="select your city" disabled selected>Select Your City </option>
        <option value="balasore">Balasore </option>
        <option value="bhadrak">Bhadrak </option>
        <option value="baripada">Baripada </option>
      </select>
      <label for="dateandtime" id="date-time" class="format">SELECT DATE AND TIME </label>
      <input type="date" id="date" name="date" class="dtt"  required>
      <input type="time" id="time" name="utime" min="8:00" max="20:00" value="8:00" class="dtt" required>
      <small id="note">(Note:Visiting hours are 8am to 8pm)</small>
      <label for="personal details" id="p-details" class="format">PERSONAL DETAILS</label>
      <input type="text" id="name" class="person-detail" placeholder="Full name*" name="uname" maxlength="20" required>
      <input type="tel" id="mobile" class="person-detail" name="ucontact" placeholder="Mobile number*" maxlength="10" required>
      <input type="email" placeholder="Email(optional)" id="email" class="person-detail" name="uemail" required>
      <textarea id="message" name="umessage" rows="5" cols="3" placeholder="Type text message" class="person-detail"></textarea>
      <button type="submit" id="submit" value="Submit" onclick="">Submit </button>

    </form>
  </div>
</main>
3. Add the following CSS code to (style.css file or) <style> tags. You can customize the styles to match your website’s theme.
* {
  margin: 0;
  padding: 0;
  box-sizing: border-box;
}
html {
  font-size: 10px;
}

body {
  font-family: "Poppins", sans-serif;
  background: rgb(67, 60, 193);
  background: linear-gradient(
    90deg,
    rgba(67, 60, 193, 1) 0%,
    rgba(116, 111, 211, 1) 0%,
    rgba(74, 150, 147, 1) 100%,
    rgba(189, 14, 246, 1) 100%
  );
}
#wrapper {
  text-align: center;
  margin-top: 10vh;
}
.container {
  display: inline-block;
  background-color: #fff;
  padding: 6vw 7vw 8vw 7vw;
}
@media (max-width: 460px) {
  #wrapper {
    margin: 12vh 0 15vh 0;
  }
}
#appoint-form {
  text-align: justify;
}
#form-head {
  text-transform: uppercase;
  font-size: 4rem;
  font-weight: 700;
  letter-spacing: 1.5px;
}
@media (max-width: 460px) {
  #form-head {
    font-size: 3rem;
    text-align: center;
  }
}
#city {
  display: block;
}
.format {
  padding-top: 2vw;
  font-size: 3rem;
}
#dropdown {
  width: 95%;
  height: 35px;
  font-size: 1.8rem;
  padding-left: 8px;
  margin-top: 5px;
  font-family: "Poppins", sans-serif;
  background-color: #eee;
}
#date-time {
  display: block;
  line-height: 2.5rem;
}
#date {
}
.dtt,
.person-detail {
  height: 35px;
  font-size: 1.8rem;
  padding-left: 8px;
  margin-top: 20px;
  font-family: "Poppins", sans-serif;
}
.dtt {
  width: 46.5%;
  background-color: #eee;
  margin-top: 1.5vw;
}
#time {
  margin-left: 8px;
}
#note {
  display: block;
  font-size: 15px;
  padding-top: 3px;
}

#name {
  margin-top: 0px;
}
.person-detail {
  display: block;
  width: 95%;
  margin: 12px 0 12px 0;
  border: 1.5px solid #aaa;
}
#mobile {
}
#email {
}
#message {
  height: 80px;
  padding-top: 3px;
}
textarea {
  resize: none;
}
#submit {
  display: block;
  border-radius: 3px;
  width: 96%;
  color: #fff;
  height: 48px;
  font-size: 2rem;
  background-color: #29b8e6;
  margin-top: 20px;
  border-style: none;
  font-family: "Poppins", sans-serif;
  opacity: 1;
  transition: 0.3s;
}
input:focus,
#dropdown:focus,
#time:focus {
  border-color: #08f;
  outline: none;
  box-shadow: 1px 1px 0px #00f;
}
#submit:hover {
  border-radius: 5px;
  opacity: 0.5;
}
@media (max-width: 460px) {
  .format {
    font-size: 2.2rem;
    padding-top: 5vw;
  }
  #p-details {
    padding-top: 50px;
  }
  .dtt {
    width: 45.8%;
  }
  .container {
    padding: 6vw 4vw 8vw 8vw;
  }
}
4. If you want to customize the background colors and fonts to match your website’s design. You can change the background colors of the form container, buttons, and text as follows:
/* Example: Change form container background color */
.container {
background-color: #your-color;
}

/* Example: Change button background and text color */
#submit {
background-color: #your-button-color;
color: #your-text-color;
}

/* Example: Change font family and size */
body {
font-family: 'Your-Font-Family', sans-serif;
font-size: 16px;
}
That’s all! hopefully, you’ve now created an Appointment Booking Form. Users can easily book appointments on your website, improving the overall user experience. If you have any questions or suggestions, feel free to comment below.
Similar Code Snippets:

I code and create web elements for amazing people around the world. I like work with new people. New people new Experiences.
I truly enjoy what I’m doing, which makes me more passionate about web development and coding. I am always ready to do challenging tasks whether it is about creating a custom CMS from scratch or customizing an existing system.

