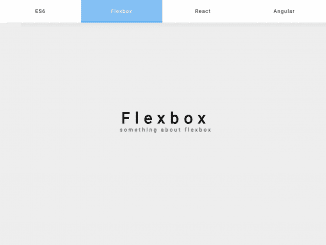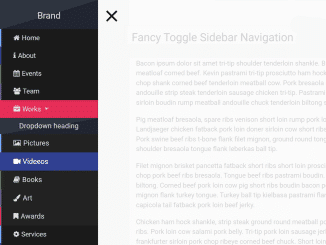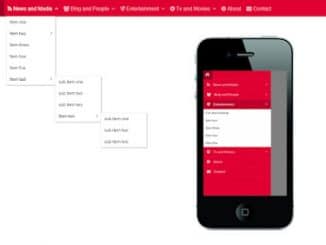
This JavaScript/jQuery code snippet helps you to create a sticky navigation bar on scroll event. It gets the scrolling position and set the sticky class when it reaches the navigation offset. Moreover, navigation comes with smooth scroll to anchor functionality to smoothly jumps between the sections.
This navigation is best fit for single page webpages/apps where users can easily navigate to the lengthy content of the website. However, you can also integrate it to personal portfolio, blog or business website.
How to Create Sticky Navigation Bar On Scroll
1. First of all, load the Google Fonts CSS by adding the following CDN link to head tag of your webpage.
<link href="https://fonts.googleapis.com/css?family=Lato:400,700" rel="stylesheet"><link rel="stylesheet" href="https://cdnjs.cloudflare.com/ajax/libs/normalize/5.0.0/normalize.min.css">
2. Create the HTML structure for the navigation as follows:
<!-- Hero -->
  <section class="et-hero-tabs">
    <h1>STICKY SLIDER NAV</h1>
    <h3>Sliding content with sticky tab nav</h3>
    <div class="et-hero-tabs-container">
      <a class="et-hero-tab" href="#tab-es6">ES6</a>
      <a class="et-hero-tab" href="#tab-flexbox">Flexbox</a>
      <a class="et-hero-tab" href="#tab-react">React</a>
      <a class="et-hero-tab" href="#tab-angular">Angular</a>
      <a class="et-hero-tab" href="#tab-other">Other</a>
      <span class="et-hero-tab-slider"></span>
    </div>
  </section>

  <!-- Main -->
  <main class="et-main">
    <section class="et-slide" id="tab-es6">
      <h1>ES6</h1>
      <h3>something about es6</h3>
    </section>
    <section class="et-slide" id="tab-flexbox">
      <h1>Flexbox</h1>
      <h3>something about flexbox</h3>
    </section>
    <section class="et-slide" id="tab-react">
      <h1>React</h1>
      <h3>something about react</h3>
    </section>
    <section class="et-slide" id="tab-angular">
      <h1>Angular</h1>
      <h3>something about angular</h3>
    </section>
    <section class="et-slide" id="tab-other">
      <h1>Other</h1>
      <h3>something about other</h3>
    </section>
  </main>
3. Style the navigation using the following CSS styles.
body {
  font-family: "Century Gothic", "Lato", sans-serif;
}

a {
  text-decoration: none;
}
.cd__main{
  display: block !important;
}

.et-hero-tabs,
.et-slide {
  display: flex;
  flex-direction: column;
  justify-content: center;
  align-items: center;
  height: 100vh;
  position: relative;
  background: #eee;
  text-align: center;
  padding: 0 2em;
}
.et-hero-tabs h1,
.et-slide h1 {
  font-size: 2rem;
  margin: 0;
  letter-spacing: 1rem;
}
.et-hero-tabs h3,
.et-slide h3 {
  font-size: 1rem;
  letter-spacing: 0.3rem;
  opacity: 0.6;
}

.et-hero-tabs-container {
  display: flex;
  flex-direction: row;
  position: absolute;
  bottom: 0;
  width: 100%;
  height: 70px;
  box-shadow: 0 0 20px rgba(0, 0, 0, 0.1);
  background: #fff;
  z-index: 10;
}
.et-hero-tabs-container--top {
  position: fixed;
  top: 0;
  left: 0;
}

.et-hero-tab {
  display: flex;
  justify-content: center;
  align-items: center;
  flex: 1;
  color: #000;
  letter-spacing: 0.1rem;
  transition: all 0.5s ease;
  font-size: 0.8rem;
}
.et-hero-tab:hover {
  color: white;
  background: rgba(102, 177, 241, 0.8);
  transition: all 0.5s ease;
}

.et-hero-tab-slider {
  position: absolute;
  bottom: 0;
  width: 0;
  height: 6px;
  background: #66B1F1;
  transition: left 0.3s ease;
}

@media (min-width: 800px) {
  .et-hero-tabs h1,
.et-slide h1 {
    font-size: 3rem;
  }
  .et-hero-tabs h3,
.et-slide h3 {
    font-size: 1rem;
  }

  .et-hero-tab {
    font-size: 1rem;
  }
}
4. Now, load the jQuery JavaScript library by adding the following CDN link before closing the body tag.
<script src='https://cdnjs.cloudflare.com/ajax/libs/jquery/3.1.0/jquery.min.js'></script>
5. In the final step, add the following JavaScript function to activate the sticky navigation bar on scroll event.
class StickyNavigation {

	constructor() {
		this.currentId = null;
		this.currentTab = null;
		this.tabContainerHeight = 70;
		let self = this;
		$('.et-hero-tab').click(function() {
			self.onTabClick(event, $(this));
		});
		$(window).scroll(() => { this.onScroll(); });
		$(window).resize(() => { this.onResize(); });
	}

	onTabClick(event, element) {
		event.preventDefault();
		let scrollTop = $(element.attr('href')).offset().top - this.tabContainerHeight + 1;
		$('html, body').animate({ scrollTop: scrollTop }, 600);
	}

	onScroll() {
		this.checkTabContainerPosition();
    this.findCurrentTabSelector();
	}

	onResize() {
		if(this.currentId) {
			this.setSliderCss();
		}
	}

	checkTabContainerPosition() {
		let offset = $('.et-hero-tabs').offset().top + $('.et-hero-tabs').height() - this.tabContainerHeight;
		if($(window).scrollTop() > offset) {
			$('.et-hero-tabs-container').addClass('et-hero-tabs-container--top');
		}
		else {
			$('.et-hero-tabs-container').removeClass('et-hero-tabs-container--top');
		}
	}

	findCurrentTabSelector(element) {
		let newCurrentId;
		let newCurrentTab;
		let self = this;
		$('.et-hero-tab').each(function() {
			let id = $(this).attr('href');
			let offsetTop = $(id).offset().top - self.tabContainerHeight;
			let offsetBottom = $(id).offset().top + $(id).height() - self.tabContainerHeight;
			if($(window).scrollTop() > offsetTop && $(window).scrollTop() < offsetBottom) {
				newCurrentId = id;
				newCurrentTab = $(this);
			}
		});
		if(this.currentId != newCurrentId || this.currentId === null) {
			this.currentId = newCurrentId;
			this.currentTab = newCurrentTab;
			this.setSliderCss();
		}
	}

	setSliderCss() {
		let width = 0;
		let left = 0;
		if(this.currentTab) {
			width = this.currentTab.css('width');
			left = this.currentTab.offset().left;
		}
		$('.et-hero-tab-slider').css('width', width);
		$('.et-hero-tab-slider').css('left', left);
	}

}

new StickyNavigation();
That’s all! hopefully, you have successfully created sticky navigation bar on scroll. If you have any questions or suggestions, feel free to comment below.
Similar Code Snippets:

I code and create web elements for amazing people around the world. I like work with new people. New people new Experiences.
I truly enjoy what I’m doing, which makes me more passionate about web development and coding. I am always ready to do challenging tasks whether it is about creating a custom CMS from scratch or customizing an existing system.

