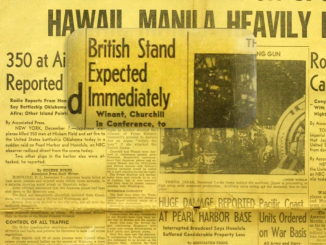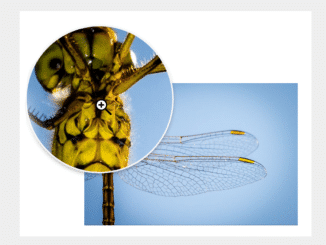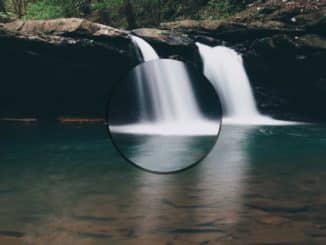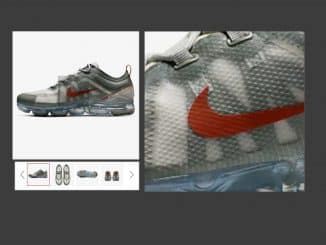
This JavaScript code creates a magnifying glass effect for images on a web page. It allows you to zoom in and view a portion of an image in greater detail when you hover or click on it. The code works by tracking your mouse or touch movements and adjusting the position of the magnifying glass and the underlying image accordingly.
This magnifying glass feature is helpful for users who want to examine fine details in images without having to open a separate viewer or zoom in on the entire image.
How to Create Javascript Image Magnifying Glass
1. First, load the Normalize CSS by adding the following CDN link into the head tag of your HTML document. (Optional)
<link rel="stylesheet" href="https://cdnjs.cloudflare.com/ajax/libs/normalize/5.0.0/normalize.min.css">
2. Create the HTML structure for your magnifying glass effect as below. This structure includes a container div (viewer) for your image and magnifying glass, a paper div (paper) for the image you want to magnify, and a glass div (glass) for the magnifying glass itself.
<div id="viewer" class="viewer">
	<div id="paper" class="paper"></div>
	<div id="glass" class="glass"></div>
</div>
2. Apply some basic CSS styles to create the visual elements of the magnifying glass and the viewer container. You can customize these styles to fit your design:
html,
body {
  height: 100%;
}

body {
  background-image: linear-gradient(45deg, #bbb 0%, #eee 100%);
  display: flex;
  justify-content: center;
  align-items: center;
}

.viewer {
  width: 800px;
  height: 520px;
  border: 1px solid rgba(0, 0, 0, 0.1);
  position: relative;
  overflow: hidden;
  box-shadow: 0 0 24px rgba(0, 0, 0, 0.13);
}
.viewer .paper {
  width: 100%;
  height: 205%;
  background: url(https://assets.codepen.io/439000/newspaper_texture2832.webp);
  background-size: 800px auto;
}
.viewer .glass {
  position: absolute;
  top: 0;
  left: 0;
  width: 360px;
  height: 190px;
  border-radius: 32px;
  background: url(https://assets.codepen.io/439000/newspaper_texture2832.webp);
  background-size: 1600px 2132px;
  pointer-events: none;
  box-shadow: inset -20px 20px 40px rgba(255, 255, 255, 0.4), inset 20px -20px 40px rgba(0, 0, 0, 0.2);
  opacity: 0.95;
}
.viewer .glass::before, .viewer .glass::after {
  position: absolute;
  left: 0;
  top: 0;
  width: 100%;
  height: 100%;
  content: "";
  border-radius: 32px;
}
.viewer .glass::before {
  box-shadow: -6px 4px 4px rgba(0, 0, 0, 0.23);
}
.viewer .glass::after {
  background-image: url(https://assets.codepen.io/439000/dirty-window-texture-11.webp);
  background-size: cover;
  mix-blend-mode: soft-light;
  opacity: 0.9;
}
3. Finally, add the following JavaScript code to functionalize the magnifying glass. You can adjust variables like offset and smoothFactor to customize the behavior of your magnifying glass.
const normalize = (va, mi, ma) => (va - mi) / (ma - mi),
			interpolate = (no, mi, ma) => mi + (ma - mi) * no,
			map = (va, mi1, ma1, mi2, ma2) => interpolate(normalize(va, mi1, ma1), mi2, ma2),
			viewer = document.getElementById("viewer"),
			paper = document.getElementById("paper"),
			glass = document.getElementById("glass"),
			offset = 50, // dragging calculated with an edge to make it feel more comfortable
			smoothFactor = .28, // x and y are not directly set, but with a tendency towards that target (tx, ty)
			STATUS_IDLE = 1, // idle
			STATUS_DRAG = 2, // dragging
			STATUS_FADE = 3; // post dragging

let glassPos = { x: 0, y: 0, tx: 0, ty: 0 },
		glassBackPos = { x: 0, y: 0, tx: 0, ty: 0 },
		paperPos = { x: 0, y: 0, tx: 0, ty: 0 },
		status = STATUS_IDLE;

const touchstart = (e) => {
	if (status === STATUS_DRAG) return;
	status = STATUS_DRAG;
	if (!glass.classList.contains("active")) glass.classList.add("active");
};

const touchmove = (e) => {
	if (status !== STATUS_DRAG) return;

	e.preventDefault();

	const cx = e.type == 'touchmove' ? e.touches[0].clientX : e.clientX,
				cy = e.type == 'touchmove' ? e.touches[0].clientY : e.clientY,
				rect = viewer.getBoundingClientRect(),
				x = Math.min(viewer.clientWidth - offset, Math.max(offset, Math.min(viewer.clientWidth, cx - rect.left))),
				y = Math.min(viewer.clientHeight - offset, Math.max(offset, Math.min(viewer.clientHeight, cy - rect.top))),
				normX = normalize(x, offset, viewer.clientWidth - offset),
				normY = normalize(y, offset, viewer.clientHeight - offset),
				diffX = paper.clientWidth - viewer.clientWidth,
				diffY = paper.clientHeight - viewer.clientHeight;

	glassPos.tx = interpolate(normX, 0, viewer.clientWidth - glass.clientWidth);
	glassPos.ty =interpolate(normY, 0, viewer.clientHeight - glass.clientHeight);

	paperPos.tx = interpolate(normX, 0, diffX);
	paperPos.ty =interpolate(normY, 0, diffY);

	glassBackPos.tx = interpolate(normX, 0, 100);
	glassBackPos.ty = interpolate(normY, 0, 100);
};

const touchend = () => {
	if (status !== STATUS_DRAG) return;
	status = STATUS_FADE;
	if (glass.classList.contains("active")) glass.classList.remove("active");
	// console.log("touchend");
};

const magnify = (() => {})();

viewer.addEventListener("touchstart", touchstart);
viewer.addEventListener("touchmove", touchmove);
viewer.addEventListener("touchend", touchend);
viewer.addEventListener("touchcancel", touchend);

viewer.addEventListener("mousedown", touchstart);
viewer.addEventListener("mousemove", touchmove);
viewer.addEventListener("mouseup", touchend);

(function tick() {
	// repeat
	requestAnimationFrame(tick);

	// nothing on idle
	if (status === STATUS_IDLE) return;

	// return to idle when smoothing out is at its end
	if (status === STATUS_FADE && Math.abs(glassPos.tx - glassPos.x) < 0.2) status = STATUS_IDLE;

	// smooth motion towards targets
	paperPos.x += smoothFactor * (paperPos.tx - paperPos.x);
	paperPos.y += smoothFactor * (paperPos.ty - paperPos.y);
	glassPos.x += smoothFactor * (glassPos.tx - glassPos.x);
	glassPos.y += smoothFactor * (glassPos.ty - glassPos.y);
	glassBackPos.x += smoothFactor * (glassBackPos.tx - glassBackPos.x);
	glassBackPos.y += smoothFactor * (glassBackPos.ty - glassBackPos.y);

	// transformations
	paper.style.transform = `translate(${-paperPos.x}px, ${-paperPos.y}px)`;
	glass.style.transform = `translate(${glassPos.x}px, ${glassPos.y}px)`;
	glass.style.backgroundPosition = `${glassBackPos.x}% ${glassBackPos.y}%`;

})();
That’s it! You’ve successfully implemented a JavaScript Image Magnifying Glass effect on your website. Users can now hover or click on images to explore them in detail. . If you have any questions or suggestions, feel free to comment below.
Similar Code Snippets:

I code and create web elements for amazing people around the world. I like work with new people. New people new Experiences.
I truly enjoy what I’m doing, which makes me more passionate about web development and coding. I am always ready to do challenging tasks whether it is about creating a custom CMS from scratch or customizing an existing system.

