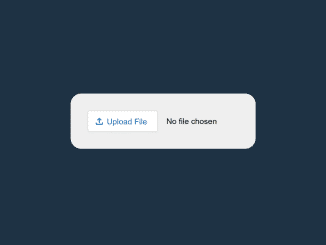
This CSS code snippet helps you to style an HTML file upload input element. It customizes the appearance of the file input button, making it visually appealing. This code enhances the user interface of file uploads.
You can use this code in your web projects to style and improve the look of file upload buttons. It enhances user experience by making file uploads more attractive, helping your website or application appear more professional. Additionally, it provides customization options to match your design preferences.
How to Style HTML File Upload Using CSS
1. First of all, load the Normalize CSS by adding the following CDN link into the head tag of your webpage.
<link rel="stylesheet" href="https://cdnjs.cloudflare.com/ajax/libs/normalize/5.0.0/normalize.min.css">
2. After, setting up the HTML structure for your file upload input. You can use the following code as a starting point:
<div class="custom-uploader">
  <input type="file"/>
</div>
3. Next, you’ll apply the custom CSS styles to this HTML structure. The following CSS code will style the file upload button and container. Here’s the CSS code you can use:
:root {
  --primary-color: #0964b0;
}

body{
  background: #1f3244 !important;
  min-height: 100vh;
  max-width: 100vw;
  display: flex;
  align-items: center;
  justify-content: center;
  padding: 5vmax;
  box-sizing: border-box;
}

.custom-uploader {
  background-color: #efefef;
  padding: 32px;
  border-radius: 20px;
}

input[type=file] {
  padding: 4px;
  margin: -4px;
  position: relative;
  outline: none;
  /* File Selector Button Styles */
  /* Faked label styles and icon */
  /* Handle Component Focus */
}
input[type=file]::file-selector-button {
  border-radius: 4px;
  padding: 0 16px;
  height: 40px;
  cursor: pointer;
  background-color: white;
  border: 1px solid rgba(0, 0, 0, 0.16);
  box-shadow: 0px 1px 0px rgba(0, 0, 0, 0.05);
  margin-right: 16px;
  /*
    This is a hack to change the button label.
    I'm hiding the default label and then
    manually applying the width based on
    updated icon and label.
  */
  width: 132px;
  color: transparent;
  /*
    Firefox doesn't support the pseudo ::before
    or ::after elements on this input field so
    we need to use the @supports rule to enable
    default styles fallback for Firefox.
  */
}
@supports (-moz-appearance: none) {
  input[type=file]::file-selector-button {
    color: var(--primary-color);
  }
}
input[type=file]::file-selector-button:hover {
  background-color: #f3f4f6;
}
input[type=file]::file-selector-button:active {
  background-color: #e5e7eb;
}
input[type=file]::before {
  position: absolute;
  pointer-events: none;
  top: 14px;
  left: 16px;
  height: 20px;
  width: 20px;
  content: "";
  background-image: url("data:image/svg+xml,%3Csvg xmlns='http://www.w3.org/2000/svg' viewBox='0 0 24 24' fill='%230964B0'%3E%3Cpath d='M18 15v3H6v-3H4v3c0 1.1.9 2 2 2h12c1.1 0 2-.9 2-2v-3h-2zM7 9l1.41 1.41L11 7.83V16h2V7.83l2.59 2.58L17 9l-5-5-5 5z'/%3E%3C/svg%3E");
}
input[type=file]::after {
  position: absolute;
  pointer-events: none;
  top: 16px;
  left: 40px;
  color: var(--primary-color);
  content: "Upload File";
}
input[type=file]:focus-within::file-selector-button, input[type=file]:focus::file-selector-button {
  outline: 2px solid var(--primary-color);
  outline-offset: 2px;
}
Copy and paste the CSS code into your CSS file or within a <style> tag in your HTML document.
Feel free to customize the CSS to match your design preferences. You can adjust colors, padding, and other styles to create the look you want for your file upload button.
That’s all! hopefully, you have successfully created an HTML File Upload with a custom CSS Style. If you have any questions or suggestions, feel free to comment below.
Similar Code Snippets:

I code and create web elements for amazing people around the world. I like work with new people. New people new Experiences.
I truly enjoy what I’m doing, which makes me more passionate about web development and coding. I am always ready to do challenging tasks whether it is about creating a custom CMS from scratch or customizing an existing system.

