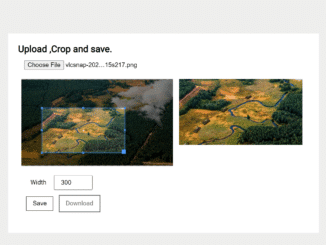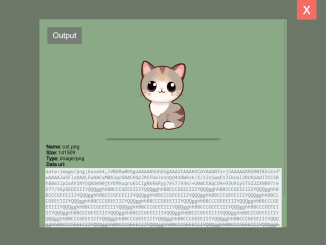
This JavaScript code snippet is based on a simple idea to crop an image and save/download them instantly. It uses the JavaScript image Cropper library (cropper.js) to perform image cropping.
Basically, this code snippet just focuses on just image cropping and lets users download it. But you can modify the Cropper JS configurations to upload the image to the server. Similarly, you can crop images programmatically or create a functionality to allows users to crop images before upload. To do so, read the Cropper JS docs.
How to Create JavaScript Crop Image and Save Functionality
1. In order to create image crop and save functionality, you need to get started with Cropper JS. So, load the Normalize CSS, Cropper CSS, and Cropper JS file into the head tag of your HTML document.
<!-- Normalize CSS -->
<link rel="stylesheet" href="https://cdnjs.cloudflare.com/ajax/libs/normalize/5.0.0/normalize.min.css">
<!-- Cropper CSS -->
<link rel='stylesheet' href='https://cdnjs.cloudflare.com/ajax/libs/cropper/2.3.4/cropper.min.css'>
<!-- Cropper JS -->
<script src='https://cdnjs.cloudflare.com/ajax/libs/cropperjs/0.8.1/cropper.min.js'></script>
2. After that, create a file input with an id "file-input" that will allow users to upload images that they want to crop. Then create an img element with a class name “cropped” and keep its src attribute empty. Similarly, create a button element with a class name “save” and a link with the class name “download”. Wrap all these elements into the main tag and define its class name “page”. The complete HTML structure for a basic image crop is as follows:
<main class="page">
	<h2>Upload ,Crop and save.</h2>
	<!-- input file -->
	<div class="box">
		<input type="file" id="file-input">
	</div>
	<!-- leftbox -->
	<div class="box-2">
		<div class="result"></div>
	</div>
	<!--rightbox-->
	<div class="box-2 img-result hide">
		<!-- result of crop -->
		<img class="cropped" src="" alt="">
	</div>
	<!-- input file -->
	<div class="box">
		<div class="options hide">
			<label> Width</label>
			<input type="number" class="img-w" value="300" min="100" max="1200" />
		</div>
		<!-- save btn -->
		<button class="btn save hide">Save</button>
		<!-- download btn -->
		<a href="" class="btn download hide">Download</a>
	</div>
 </main>
3. After creating the HTML, use the following CSS style for the image crop interface. You can also use your own CSS styles or change in order to customize it according to your needs.
.page {
	margin: 1em auto;
	max-width: 768px;
	display: flex;
	align-items: flex-start;
	flex-wrap: wrap;
	height: 100%;
}

.box {
	padding: 0.5em;
	width: 100%;
	margin: 0.5em;
}

.box-2 {
	padding: 0.5em;
	width: calc(100%/2 - 1em);
}

.options label,
.options input {
	width: 4em;
	padding: 0.5em 1em;
}

.btn {
	background: white;
	color: black;
	border: 1px solid black;
	padding: 0.5em 1em;
	text-decoration: none;
	margin: 0.8em 0.3em;
	display: inline-block;
	cursor: pointer;
}

.hide {
	display: none;
}

img {
	max-width: 100%;
}
4. Finally, initialize the cropper JS with the following configurations. You can add the following JS code between the <script> tag or create a separate JS file and include it in your project.
// vars
let result = document.querySelector('.result'),
img_result = document.querySelector('.img-result'),
img_w = document.querySelector('.img-w'),
img_h = document.querySelector('.img-h'),
options = document.querySelector('.options'),
save = document.querySelector('.save'),
cropped = document.querySelector('.cropped'),
dwn = document.querySelector('.download'),
upload = document.querySelector('#file-input'),
cropper = '';

// on change show image with crop options
upload.addEventListener('change', e => {
  if (e.target.files.length) {
    // start file reader
    const reader = new FileReader();
    reader.onload = e => {
      if (e.target.result) {
        // create new image
        let img = document.createElement('img');
        img.id = 'image';
        img.src = e.target.result;
        // clean result before
        result.innerHTML = '';
        // append new image
        result.appendChild(img);
        // show save btn and options
        save.classList.remove('hide');
        options.classList.remove('hide');
        // init cropper
        cropper = new Cropper(img);
      }
    };
    reader.readAsDataURL(e.target.files[0]);
  }
});

// save on click
save.addEventListener('click', e => {
  e.preventDefault();
  // get result to data uri
  let imgSrc = cropper.getCroppedCanvas({
    width: img_w.value // input value
  }).toDataURL();
  // remove hide class of img
  cropped.classList.remove('hide');
  img_result.classList.remove('hide');
  // show image cropped
  cropped.src = imgSrc;
  dwn.classList.remove('hide');
  dwn.download = 'imagename.png';
  dwn.setAttribute('href', imgSrc);
});
That’s all! Hopefully, you have successfully created an image crop functionality in your project. If you have any questions or facing any issues, feel free to comment below.
Similar Code Snippets:

I code and create web elements for amazing people around the world. I like work with new people. New people new Experiences.
I truly enjoy what I’m doing, which makes me more passionate about web development and coding. I am always ready to do challenging tasks whether it is about creating a custom CMS from scratch or customizing an existing system.

